Let’s say we want to map the BindTuning Slider with a custom SharePoint List, with the Smart Slider will have this flexibility. The BindTuning Slider list will be used to create a map of the columns content that will be shown on the page based on the Custom List Items.
Connect to Template List
- Add the BindTuning Slider list to the zone Template Slider.
-
On the first text box insert one of the two:
- The URL of the list you created
- A URL of a site collection
-
Choose your Filtering Options to filter your list elements. You can choose to have:
- No Filters - You show all the items on the list.
- CAML Query - You can query the list to just show items based on the query built.
- Select a View of the list - You can pick the List View created and just show those elements on the list.
Connect to Source List
The Source list is where your information will be pulled from. On the Slider Caption, we'll create the mapping used to present the information.
- Click on + Add List first;
-
On the first text box insert one of the two:
- The URL of the list you created
- A URL of a site collection
-
Choose your Filtering Options to filter your list elements. You can choose to have:
- No Filters - You show all the items on the list.
- CAML Query - You can query the list to just show items based on the query built.
- Select a View of the list - You can pick the List View created and just show those elements on the list.
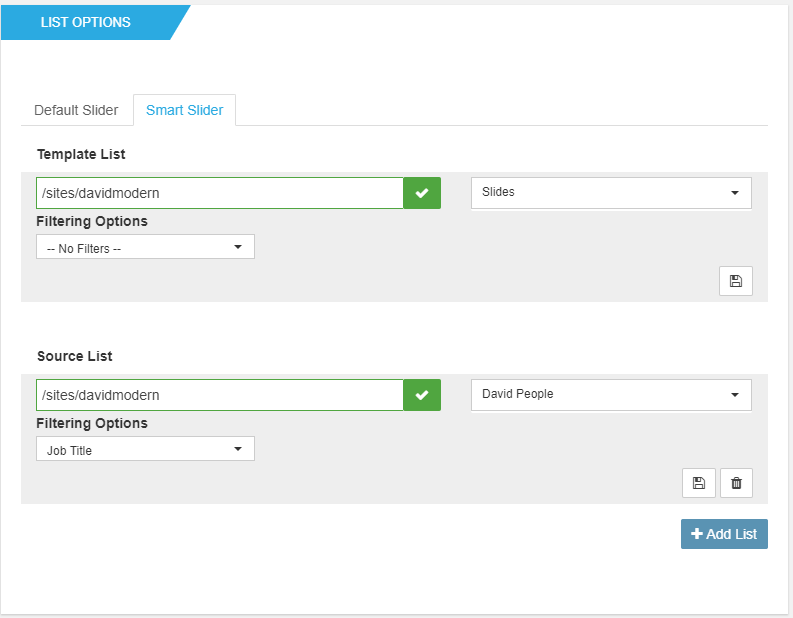
Need to add more lists? You can do it by clicking on Add List.
You can combine the other Web Part Properties to have the desired look:
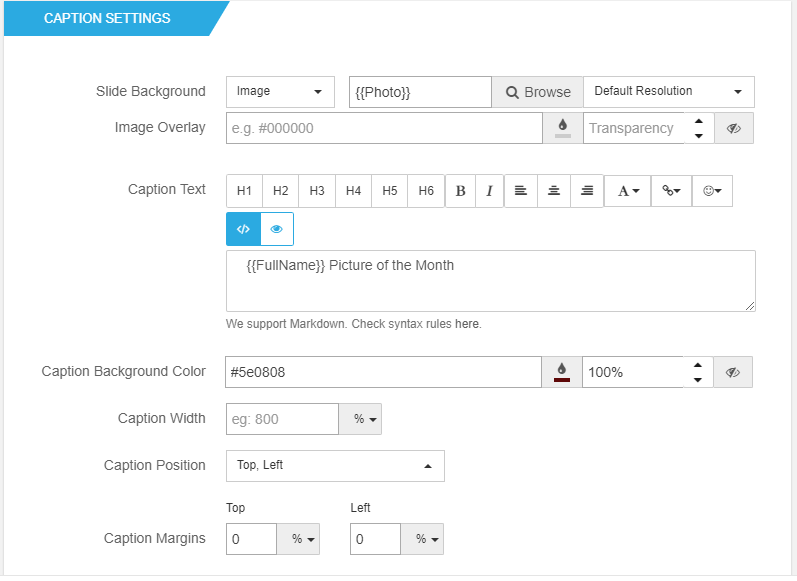
Captions Settings
-
Depending on your SharePoint experience, Add a slider to the Web Part:
- Modern Experience
For the background, you can use a field from the source list to add an image/color/video. Simply choose the image option in the background field and place the column's internal name in brackets: {{FIELD_NAME}}, as shown in the image below.
For the content, you can use a field from the queried list to add text. Simply type the column's internal name in brackets: {{FIELD_NAME}}, as shown in the image below. You can combine static text with the Column's Internal.
You can still use the MarkDown syntax as normal.
Here is what you need to do to check your column names:
- Access Site contents and open your list;
- On the top menu, click on List and then List Settings (or Settings > List Settings);
- On the Columns section, click to open the colum name you want to use;
- Inside, on the URL look for "...Field=...".
- Copy the internal name;
- Now paste the name on the text box;

After setting everything up, click on Publish. You can also preview the Slider on the page before saving it, by clicking on the Preview button.
How to use CAML Query
You can use a free 3rd party software for creating the query, like this one👉http://www.u2u.be/software/. Then you can copy the query and use it as a filter. Below is an example with multiple filters allowed of a query you can have.
If you’re using SharePoint 2013, install the U2U CAML Query Builder for SharePoint 2013 (Standalone Edition).
<View>
<Query>
    <Where>
        <And>// have to meet this 2 conditions
            <Eq> //Equal
                <FieldRef Name='PromotedState' />
                <Value Type='Number'>2</Value>
            </Eq>
            <Leq> //Lower or Equal
                <FieldRef Name="Created" />
                <Value Type="DateTime" Offset="-90"> // -90 days from today
                    <Today />
                </Value>
            </Leq>
        </And>
    </Where>
    <OrderBy>
        <FieldRef Name='Created' Ascending='False'></FieldRef> // Most Recent to older created element
    </OrderBy>
</Query>
<RowLimit>3</RowLimit> // Number of items that you want to show
</View>